
Agisoft Metashape basic workflow
Even though Metashape is neither open source nor free, it is a powerful tool for deriving point clouds and various surface models from standard RGB imagery. It offers a user-friendly interface and strikes a good balance between hardware requirements and cost-efficiency. For more advanced use, understanding the detailed settings is essential.
Add the photos to Metashape
Let’s begin by following the white rabbit.
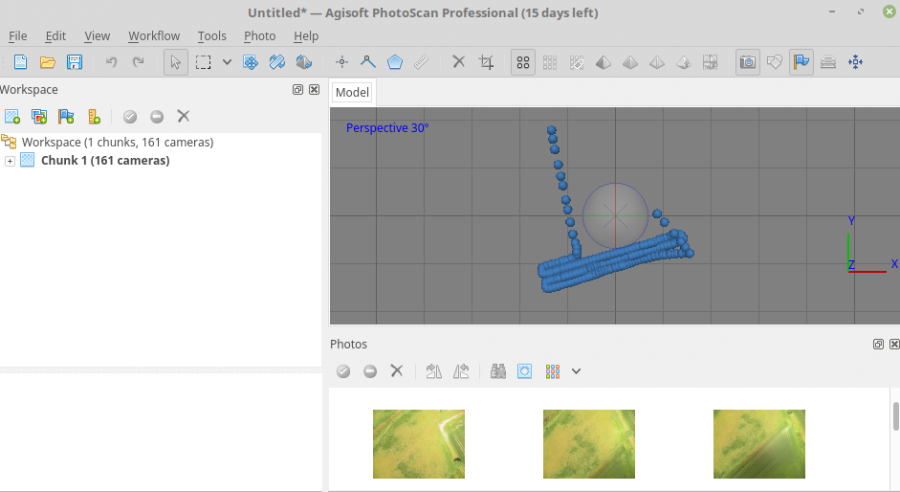
After importing your aerial images into Metashape, they will appear arranged along the flight path, as shown below.
Alignment
The Align Images process is somewhat explorative. For a quick start, it’s useful to apply the following recommended settings:
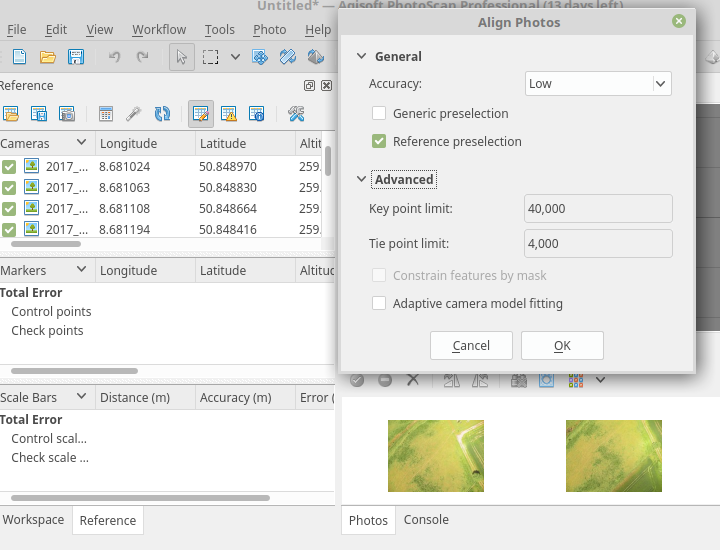
This will provide a good initial assessment of how well your data can be aligned.
However, alignment quality depends greatly on sensor type, lighting conditions, and surface characteristics. For high-quality imagery, increasing the keypoint limit beyond 240,000 generally leads to no significant improvements. As a rule of thumb, calculate the maximum number of keypoints as megapixels × 6400.
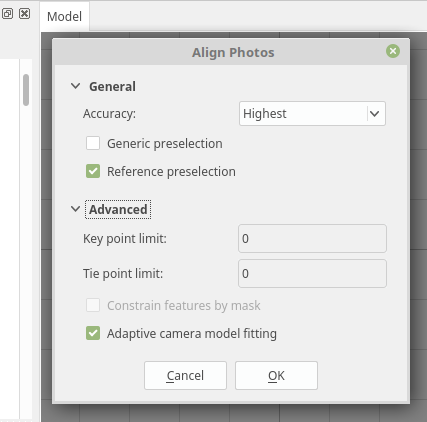
For images from GoPro, Mapir, or DJI cameras, this results in about 77,000 keypoints. Setting the parameters to zero tells Metashape to use the maximum, which can work well if you later filter your point clouds and models. A typical high-quality setup might look like this:
Creating high-quality sparse (tie) point clouds
The key to producing a clean sparse point cloud is minimizing noise and achieving accurate spatial alignment. In practice, this means obtaining the best possible image alignment and then refining it through filtering and camera optimization. If needed, you can further improve results using Ground Control Points (GCPs).
We’ve had good experience following juhutan, who recommends this workflow for high-quality point cloud generation. Typically, only one iteration of the following steps is required:
- Remove sparse points via gradual selection (see below)
- Optimize cameras (after each removal)
- Optionally repeat steps 1–2 until reconstruction error is minimized
Explanation:
- Step 1 removes spurious points from the cloud and smooths surfaces.
- Step 2 updates all cameras to reflect the improved geometry.
Gradual Selection Process
Before beginning, right-click on your current chunk in the Workspace panel and choose “Duplicate Chunk” to preserve a backup.
- Select
Reconstruction Uncertainty, enter a value like10, click OK, and pressDELto delete the selected points. IfDELdoesn’t work, click inside the model window first. - Then select
Reprojection Error, set it to< 1, delete selected points, and click the wand icon again. - Finally, choose
Projection Accuracy, and delete the lowest10%of points.
More details can be found in this tutorial by dinosaurpaleo.
Build 3D model (mesh)
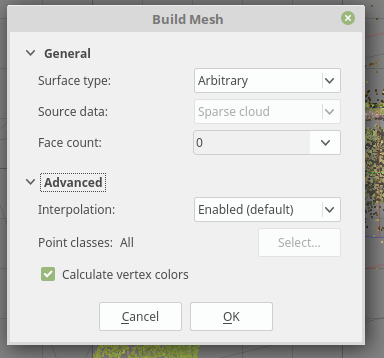
You can now use the refined sparse cloud to build a 3D model. The process is straightforward. For best results and a high face count in the mesh, use the following settings:
Generate Orthophoto
Creating an orthoimage is also a straightforward process, slightly different from generating a dense point cloud. Follow this workflow:
- Load the prepared images
- Check image quality
- Align images as described earlier
- Build the mesh using the optimized sparse point cloud
- Generate the orthoimage based on the mesh
Using a mesh-based surface generally produces better results for low-altitude imagery. However, whether to use a dense or sparse point cloud depends on your dataset. In many cases, a well-processed sparse cloud will deliver better ortho results.
Recommended settings:
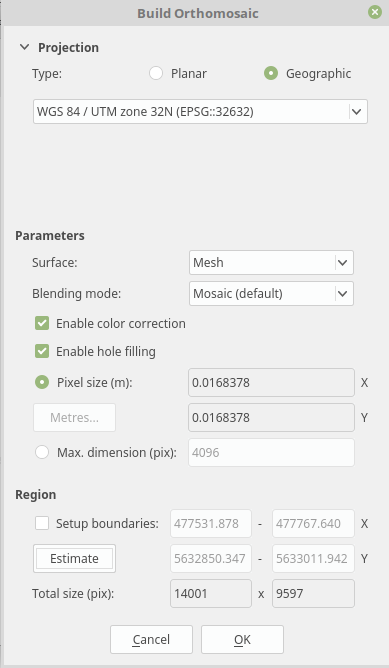
Et voilà — you now have a high-quality orthoimage.
Creating high-quality dense point clouds
Micro-remote sensing often works with a single spectral band (RGB), but its main advantage over LiDAR is the ability to repeatedly and flexibly observe the surface over time. With Metashape, dense clouds can still be structured into layers, depending on what is visible in the data. For example, deciduous forests can be analyzed in winter (to detect terrain and tree structure) or summer (to model the canopy surface).
Dense clouds can be exported in various formats for further use in QGIS, SAGA, or 3D modeling tools. This makes it easy to integrate with established workflows originally developed for LiDAR or photogrammetry.
Note: The dense cloud settings control both quality and processing time. Higher quality means longer processing.
- Aggressive filtering is fast but may lose detail.
- Moderate or mild filtering retains finer structures but requires more time.
You can calculate the dense point cloud after the images are aligned. Although it’s listed earlier in Metashape’s workflow dropdown, it is often smarter to generate the orthoimage first, as dense cloud creation is by far the most time-consuming step.